Display your Spotify profile data in a web app
This guide creates a simple client-side application that uses the Spotify Web API to get user profile data. We'll show both TypeScript and JavaScript code snippets, make sure to use the code that is correct for your application.
External applications can use the Spotify Web API to retrieve Spotify content, such as song data, album data and playlists. However, in order to access user-related data with the Spotify Web API, an application must be authorized by the user to access that particular information.
Prerequisites
To work through this guide you'll need:
- A Node.js LTS environment or later.
- npm version 7 or later
- A Spotify account
Set up your account
Login to the Spotify Developer Dashboard. If necessary, accept the latest Developer Terms of Service to complete your account set up.
Creating a Spotify app
We will need to register a new app to generate valid credentials - we'll use these credentials later to perform API calls. Follow the apps guide to learn how to create an app and generate the necessary credentials.
Once you've created your app, make a note of your client_id.
Creating a new project
This app uses Vite as a development server.
We'll scaffold a new project with the Vite create command and use their default template to give us a basic app:
Select y when it prompts you to install Vite.
Change directory to the new app directory that Vite just created and start the development server:
_10cd spotify-profile-demo_10npm install_10npm run dev
The default Vite template creates some files that we won't need for this demo, so you can delete all of the files in ./src/ and ./public/
Creating the user interface
This demo is going to be a single page application that runs entirely in the browser. We're going to replace the provided index.html file with a simple HTML page that constitutes the user interface to display the user's profile data.
Start by deleting the content of the index.html file and replacing it with a html and head tag that references a TypeScript/JavaScript file (src/script.ts, or src/script.js, we'll create this file later).
Inside the body, we'll add some markup to display the profile data:
_13<h1>Display your Spotify profile data</h1>_13_13<section id="profile">_13<h2>Logged in as <span id="displayName"></span></h2>_13<span id="avatar"></span>_13<ul>_13 <li>User ID: <span id="id"></span></li>_13 <li>Email: <span id="email"></span></li>_13 <li>Spotify URI: <a id="uri" href="#"></a></li>_13 <li>Link: <a id="url" href="#"></a></li>_13 <li>Profile Image: <span id="imgUrl"></span></li>_13</ul>_13</section>
Some elements in this block have id attributes. We'll use these to replace the element's text with the data we fetch from the Web API.
Calling the Web API
We're going to use the Web API to get the user's profile data. We'll use the authorization code flow with PKCE to get an access token, and then use that token to call the API.
How it works
- When the page loads, we'll check if there is a code in the callback query string
- If we don't have a code, we'll redirect the user to the Spotify authorization page.
- Once the user authorizes the application, Spotify will redirect the user back to our application, and we'll read the code from the query string.
- We will use the code to request an access token from the Spotify token API
- We'll use the access token to call the Web API to get the user's profile data.
- We'll populate the user interface with the user's profile data.
Create a src/script.ts or src/script.js file and add the following code:
This is the outline of our application.
On the first line there is a clientId variable - you'll need to set this variable to the client_id of the Spotify app you created earlier.
The code now needs to be updated to redirect the user to the Spotify authorization page. To do this, let's write the redirectToAuthCodeFlow function:
In this function, a new URLSearchParams object is created, and we add the client_id, response_type, redirect_uri and scope parameters to it. The scope parameter is a list of permissions that we're requesting from the user. In this case, we're requesting the user-read-private and user-read-email scopes - these are the scopes that allow us to fetch the user's profile data.
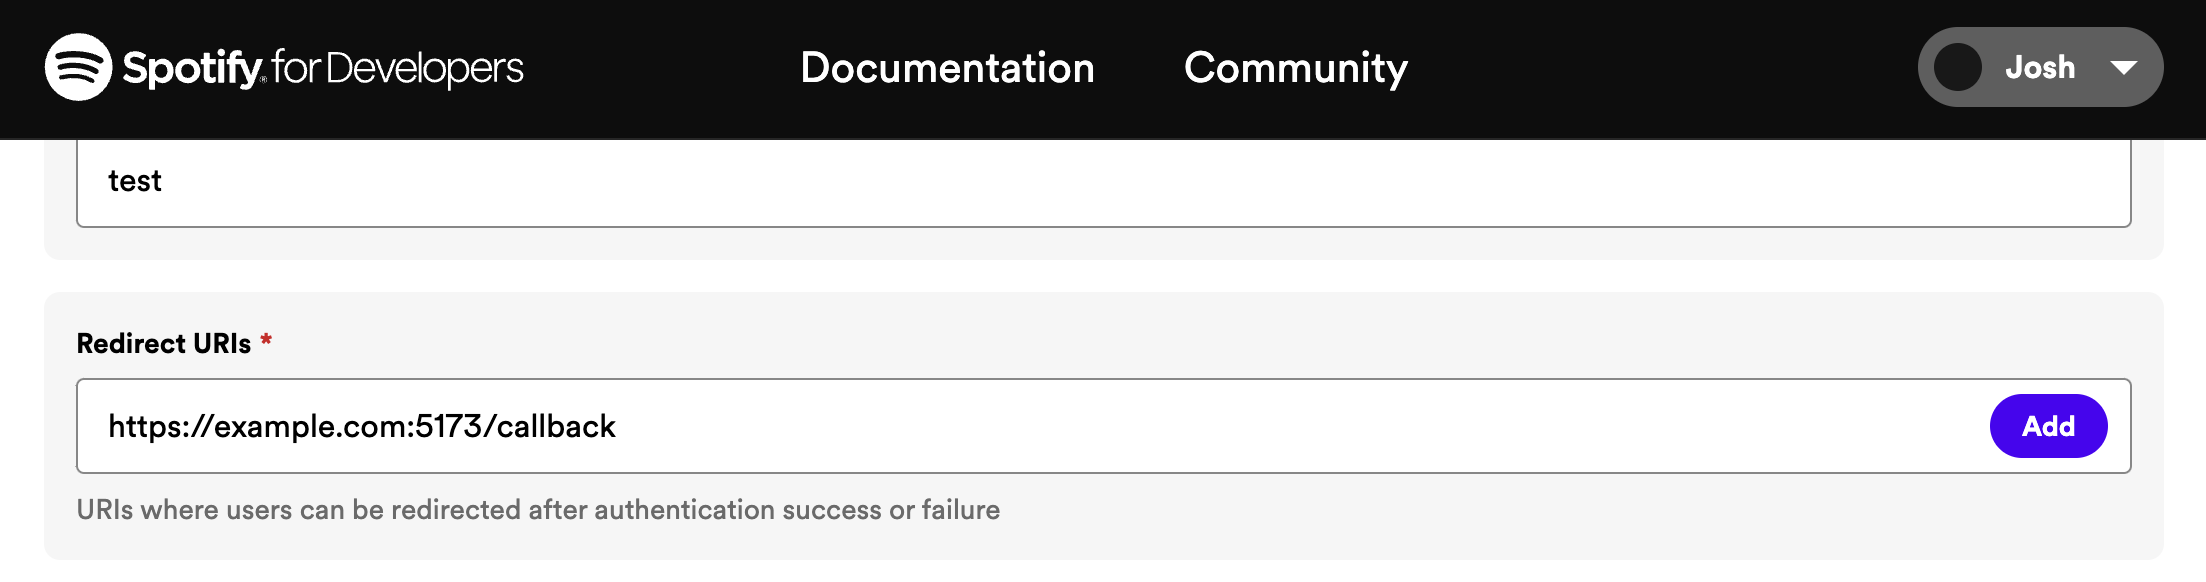
The redirect_uri parameter is the URL that Spotify will redirect the user back to after they've authorized the application. In this case, we're using a URL that points to our local Vite dev server.
You need to make sure this URL is listed in the Redirect URIs section of your Spotify Application Settings in your Developer Dashboard.
You will also notice that we are generating PKCE verifier and challenge data, we're using this to verify that our request is authentic. We're using local storage to store the verifier data, which works like a password for the token exchange process.
To prevent the user from being stuck in a redirect loop when they authenticate, we need to check if the callback contains a code parameter. To do this, the first three lines of code in the file are modified like this:
_11const clientId = "your_client_id";_11const params = new URLSearchParams(window.location.search);_11const code = params.get("code");_11_11if (!code) {_11 redirectToAuthCodeFlow(clientId);_11} else {_11 const accessToken = await getAccessToken(clientId, code);_11 const profile = await fetchProfile(accessToken);_11 populateUI(profile);_11}
In order to make sure that the token exchange works, we need to write the getAccessToken function.
In this function, we load the verifier from local storage and using both the code returned from the callback and the verifier to perform a POST to the Spotify token API. The API uses these two values to verify our request and it returns an access token.
Now, if we run npm run dev, and navigate to http://127.0.0.1:5173 in a browser, we'll be redirected to the Spotify authorization page. If we authorize the application, we'll be redirected back to our application, but no data will be fetched and displayed.
To fix this, we need to update the fetchProfile function to call the Web API and get the profile data. Update the fetchProfile function:
In this function, a call is made to https://api.spotify.com/v1/me using the browser's Fetch API to get the profile data. The Authorization header is set to Bearer ${token}, where token is the access token that we got from the https://accounts.spotify.com/api/token endpoint.
If we add a console.log statement to the calling code we can see the profile data that is returned from the API in the browser's console:
_10} else {_10 const profile = await fetchProfile(token);_10 console.log(profile); // Profile data logs to console_10 ..._10}
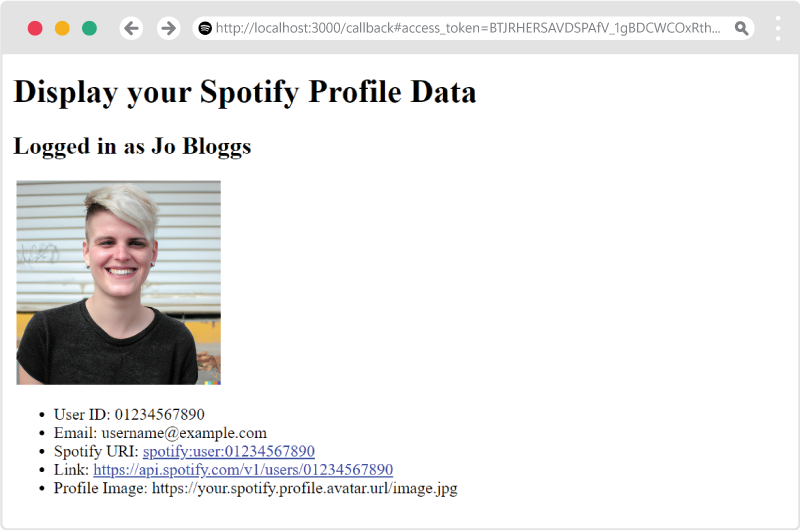
Finally, we need to update the populateUI function to display the profile data in the UI.
To do this, we'll use the DOM to find our HTML elements and update them with the profile data:
You can now run your code by running npm run dev in the terminal and navigating to http://127.0.0.1:5173 in your browser.
Adding extra type safety for TypeScript developers
At the moment, even though we're using TypeScript, we don't have any type safety around the data being returned from the Web API. To improve this, we can create a UserProfile interface to describes the data that we expect to be returned from the API. Adding an interface will define the shape of the object that we're expecting, this will make using the data type-safe and will allow for type prompts while coding, making a more pleasant developer experience if you extend this project in future.
To do this, create a new file called types.d.ts in the src folder and add the following code:
_23interface UserProfile {_23 country: string;_23 display_name: string;_23 email: string;_23 explicit_content: {_23 filter_enabled: boolean,_23 filter_locked: boolean_23 },_23 external_urls: { spotify: string; };_23 followers: { href: string; total: number; };_23 href: string;_23 id: string;_23 images: Image[];_23 product: string;_23 type: string;_23 uri: string;_23}_23_23interface Image {_23 url: string;_23 height: number;_23 width: number;_23}
We can now update our calling code to expect these types:
_10async function fetchProfile(token: string): Promise<UserProfile> {_10 // ..._10}_10_10function populateUI(profile: UserProfile) {_10 // ..._10}
You can view and fork the final code for this demo on GitHub: Get User Profile Repository.